Maintaining the braking system of your motorcycle is crucial for safety and performance. Over time, brake pads wear out and require prompt replacement to ensure optimal braking efficiency. Understanding the process of replacing your motorcycle brake pads can save you time and money, while also enhancing your riding experience.
This comprehensive guide will walk you through the step-by-step process of replacing brake pads. Whether you’re a seasoned mechanic or a novice biker, you’ll find useful tips and insights to help you confidently tackle this essential maintenance task. From gathering the necessary tools to the final installation checks, each step is designed to ensure your safety on the road.
Properly functioning brake pads are vital not only for stopping power but also for protecting your motorcycle’s other components. Regularly checking and replacing worn pads is a responsible practice that every rider should incorporate into their maintenance routine. Let’s get started on ensuring your motorcycle operates at its best.
Selecting the Right Brake Pads for Your Motorcycle

Choosing the appropriate brake pads for your motorcycle is crucial for ensuring optimal performance and safety. There are several factors to consider when selecting replacement pads, including material composition, intended use, and compatibility with your bike.
1. Material Composition: Brake pads are typically made from various materials like organic, semi-metallic, and ceramic. Organic pads provide smooth performance and are less harsh on rotors but wear out faster. Semi-metallic pads offer better heat dissipation and durability, making them suitable for both street and track use. Ceramic pads provide excellent stopping power and longevity but may be more expensive.
2. Intended Use: Consider how you ride. For daily commuting, organic pads might be sufficient, while sport riders should opt for semi-metallic or ceramic options for better performance under high stress. If you frequently ride in wet conditions, ensure the pads you choose have effective water-repellent properties.
3. Compatibility: Always check the compatibility of the brake pads with your specific motorcycle model. Refer to your owner’s manual or consult with a professional to ensure proper fitment. Using pads that are not designed for your motorcycle can compromise braking performance and safety.
4. Brand and Quality: It’s advisable to invest in high-quality brake pads from reputable manufacturers. Well-known brands often provide better performance, longevity, and safety features. Read reviews and seek recommendations from fellow riders or mechanics.
By considering these factors, you’ll be able to select the right brake pads for your motorcycle, ensuring reliable braking performance and a safer riding experience. Proper maintenance and timely replacement of pads are essential to keep your motorcycle in top condition.
Tools and Materials Needed for Brake Pad Replacement
To successfully replace your motorcycle brake pads, having the right tools and materials is essential. Below is a list of necessary items to ensure a smooth brake pad replacement process.
1. Motorcycle Service Manual: This guide provides specific instructions and torque specifications for your motorcycle model, making the replacement process straightforward.
2. Brake Pads: Select high-quality brake pads that are compatible with your motorcycle. Ensure they meet the manufacturer’s specifications for optimal performance.
3. Basic Hand Tools: A set of wrenches, ratchets, and sockets will be required to remove the brake calipers and other components. Common sizes include 10mm to 14mm, but check your bike’s specifications.
4. Allen Wrenches: Many motorcycles use Allen bolts on their brake components. Make sure to have a complete set to avoid any inconvenience during replacement.
5. Brake Cleaner: A brake cleaner will help you clean the brake calipers and surrounding areas, ensuring that no dirt or debris interferes with the new brake pads.
6. Lubricant: High-temperature brake lubricant should be used on the caliper slides and backing of new pads to prevent squealing and ensure smooth operation.
7. Torque Wrench: This tool is critical for tightening bolts to the manufacturer’s specified torque, ensuring safety and proper function.
8. Jack or Stand: A motorcycle jack or stand is necessary for lifting the bike securely, providing easy access to the wheels and brakes during the replacement process.
9. Safety Gear: Always wear safety glasses and gloves to protect yourself during the replacement process. This ensures you stay safe from debris and other hazards.
10. Rags: Keep rags handy for cleaning your hands, tools, and the brake area as you work. This helps maintain a clean working environment and prevents contamination.
Gathering these tools and materials before starting the brake pad replacement will make the process efficient and safer, allowing you to ride with confidence afterwards.
Step-by-Step Process for Removing and Installing Brake Pads

Before starting the replacement process, ensure you have the necessary tools: a socket set, a wrench, a C-clamp, and a brake pad spreader. Additionally, have the new brake pads ready for installation.
Begin by safely securing your motorcycle on a flat surface. Use a center stand or a motorcycle lift to elevate the bike, ensuring it remains stable throughout the process.
Remove the wheel that houses the brake system. Typically, this requires loosening the axle nut with a socket set and carefully sliding the wheel off. Once the wheel is removed, gain access to the brake caliper mounted on the disc.
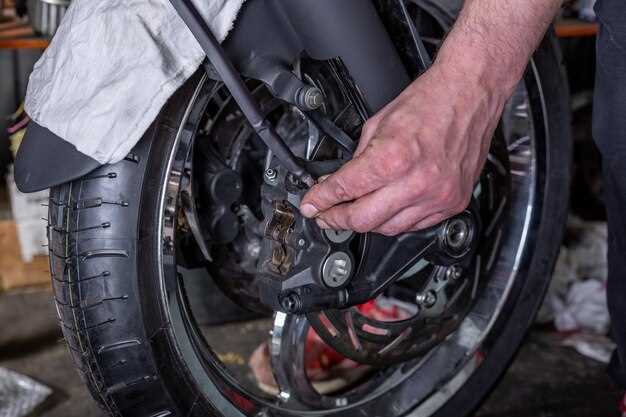
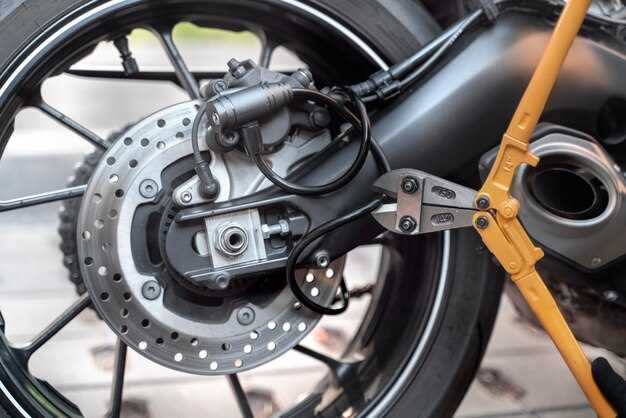
Locate the caliper bolts and carefully unscrew them using the appropriate wrench. Once the bolts are removed, gently lift the caliper away from the disc. Be cautious not to stress the brake line; support the caliper with a bungee cord or similar device if necessary.
Now that the caliper is free, you can remove the old brake pads. Examine the pads, noting their orientation. Slide them out from their position. You may need to compress the caliper piston using a C-clamp to create sufficient space for the new pads.
Once the piston is retracted, take the new brake pads and install them in the caliper, ensuring they are oriented correctly. Slide the pads into place, fitting them snugly where the old pads were situated.
With the new pads in place, reposition the caliper over the brake disc. Align the caliper bolt holes and secure it with the bolts removed earlier. Tighten them to the manufacturer’s specifications to ensure proper locking.
Reinstall the wheel back onto the motorcycle, tightening the axle nut securely. Make sure everything is in place and properly aligned before lowering the bike from its elevated position.
Finally, press the brake lever several times to seat the new pads against the disc properly. Check for any unusual noises or movement before taking the motorcycle for a test ride. Ensure the brakes engage smoothly and fully before considering the replacement process complete.


