


Experiencing a flat tire on your motorcycle can be a frustrating issue, especially when you are out on the road. However, knowing how to repair a flat motorcycle tire yourself can save you time and money, while also empowering you with essential maintenance skills. Whether you’re a seasoned rider or a novice, understanding the steps involved in tire repair is a valuable skill that can enhance your overall riding experience.
The process of repairing a flat motorcycle tire may seem daunting at first, but with the right tools and knowledge, it can be accomplished effectively. By familiarizing yourself with the common causes of tire flats and the necessary steps to address them, you will be better prepared to handle such emergencies. In the following sections, we will walk you through the essentials of assessing the damage, preparing for the repair, and executing the repair safely and correctly.
Equipped with your repair kit and a clear understanding of the procedure, you’ll gain confidence in your ability to tackle this common motorcycle issue. Whether you’re dealing with a minor puncture or a more significant problem, being proactive about motorcycle maintenance can contribute to a safer and more enjoyable ride.
Identifying the Cause of the Flat Tire

Before you can effectively repair a flat motorcycle tire, it is essential to determine the underlying cause of the air loss. There are several common reasons that may lead to a flat tire, each requiring a different approach for resolution.
First, inspect the tire for any obvious punctures or foreign objects. Sharp objects such as nails, screws, or glass can easily penetrate the tire tread and cause a leak. If you find any debris embedded in the tire, do not remove it until you are ready to perform the repair, as it will help slow the air loss.
Next, examine the sidewalls for signs of damage. Cracks, cuts, or abrasions can compromise the tire’s integrity and lead to deflation. If the sidewalls are damaged, repair options may be limited, and replacement could be necessary.
Another factor to consider is the tire’s age and condition. Tires that have been in use for an extended period may develop dry rot, resulting in weak spots. Always check the manufacturing date and consider replacing any tires that are significantly worn or older than their recommended lifespan.
Additionally, evaluate the valve stem for leaks. The valve stem is a common area for air loss, and a simple inspection can reveal if it’s cracked or damaged. If you suspect a leak at the valve, it may need tightening or complete replacement.
Finally, checking for improper tire pressure is crucial. A tire that is consistently under-inflated can develop flat spots and ultimately lead to a blowout. Make a habit of regularly monitoring and maintaining the recommended tire pressure to ensure optimal performance and prevent flats.
By accurately identifying the cause of the flat tire, you can employ the appropriate repair techniques and ensure a safer riding experience.
Gathering the Necessary Tools and Materials
Before you begin the process of repairing a flat motorcycle tire, it is essential to gather all necessary tools and materials. This preparation will ensure a smooth and efficient repair process. The primary items you will need include a tire repair kit, which typically contains plugs, a reamer, and a insertion tool for sealing punctures effectively.
Additionally, you should have a tire pressure gauge to check the air pressure before and after the repair. A portable air compressor or a CO2 inflator will also be crucial for reinflating the tire once the repair is complete. Make sure to have a set of tire levers on hand, as they will assist in removing the tire from the rim if necessary.
It’s also advisable to have a clean cloth or rag for wiping surfaces and removing debris. A bowl or container can be helpful for collecting small parts while you work. Finally, ensure that you have a safe workspace, preferably with good lighting, to make the repair process easier and more effective. Having all these items ready will significantly enhance the likelihood of a successful tire repair.
Step-by-Step Tire Repair Process
Repairing a flat motorcycle tire requires a systematic approach to ensure safety and effectiveness. Follow these steps carefully:
Step 1: Gather Necessary Tools
Before starting, collect all required tools: tire repair kit, tire levers, air pump, and possibly a wrench. A clean workspace will assist in the repair process.
Step 2: Remove the Tire
Start by placing the motorcycle on a stable stand. Loosen the axle nut using the wrench and carefully remove the wheel from the motorcycle. Ensure you take note of the orientation for easy reinstallation.
Step 3: Inspect the Tire
Once the tire is off, visually inspect it for punctures or cuts. If the damage is not immediately visible, use soapy water to identify leaks by looking for bubbles forming.
Step 4: Clean the Area
Once you locate the puncture, clean the area around the damage. Remove any dirt or debris to ensure a proper seal later. This is crucial before applying any repair materials.
Step 5: Apply the Repair Kit
Use a tire repair plug or a patch from your kit. For a plug, insert it into the puncture using the insertion tool provided. If using a patch, apply it according to the kit’s instructions, ensuring a firm bond with the tire surface.
Step 6: Allow for Curing
If using adhesives, allow sufficient time for the patch or plug to cure as per manufacturer guidelines. This step ensures a durable fix and helps prevent future leaks.
Step 7: Reinflate the Tire
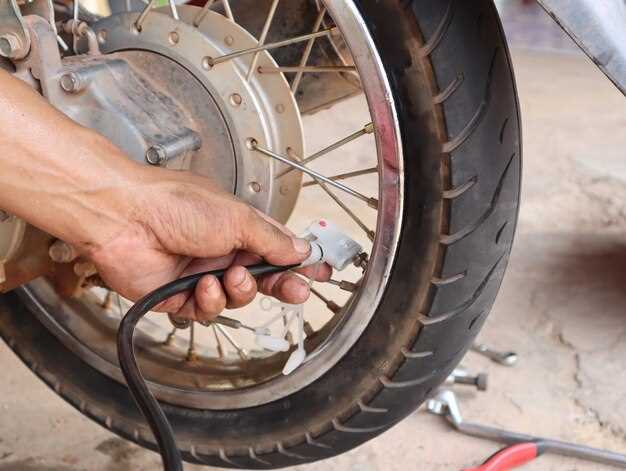
Once the repair has cured, check the air pressure specifications for your motorcycle tire. Use an air pump to reinflate the tire to the recommended level. Routinely check for leaking air around the repaired area.
Step 8: Reinstall the Tire
Position the tire back onto the motorcycle wheel. Ensure it is aligned correctly and tighten the axle nut securely. Double-check that everything is in place before lowering the motorcycle.
Step 9: Test Ride
After the repair, take a short test ride in a safe area. Monitor the performance of the repaired tire closely. If any issues arise, consider consulting a professional.


