Providing proper maintenance for your motorcycle is essential for maximizing its performance and ensuring your safety on the road. A regular DIY maintenance routine not only extends the life of your bike but also enhances your riding experience by keeping it in top-notch condition. Whether you’re a seasoned rider or a beginner, understanding the fundamentals of motorcycle care is crucial.
In this article, we will explore a variety of essential maintenance tips that every motorcycle enthusiast should know. From checking the oil and tire pressure to inspecting the brakes and battery, these tasks are simple yet vital for the overall health of your motorcycle. By incorporating these routine maintenance practices into your schedule, you can avoid costly repairs and ensure a smooth ride.
Stay tuned as we break down each critical aspect of motorcycle upkeep, empowering you to take charge of your bike’s health and enjoy every ride with confidence. Let’s dive into a comprehensive guide that will benefit every rider, regardless of skill level, and transform routine maintenance into a rewarding aspect of your motorcycle journey.
Checking and Changing Engine Oil: A Step-by-Step Guide
Regular maintenance of your motorcycle includes checking and changing engine oil, essential for ensuring optimal performance and longevity. Here’s a straightforward diy guide to help you through the process.
Step 1: Gather Your Tools and Supplies
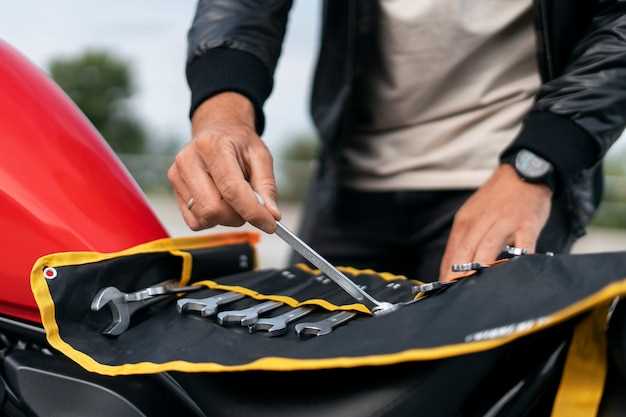
Before you start, make sure you have the necessary tools: a socket wrench, an oil filter wrench, a funnel, and a drain pan. You’ll also need fresh engine oil and a new oil filter specific to your motorcycle model.
Step 2: Warm Up the Engine
Start your motorcycle and let it run for a few minutes. This warms up the engine oil, making it easier to drain.
Step 3: Secure the Motorcycle
Ensure your motorcycle is on a level surface. Use a bike stand or support it securely to avoid any accidents during maintenance.
Step 4: Drain the Old Oil
Locate the oil drain plug underneath your motorcycle. Place the drain pan under it and carefully remove the plug using your socket wrench. Allow the old oil to drain completely.
Step 5: Replace the Oil Filter
Using the oil filter wrench, remove the old oil filter. Make sure to lubricate the rubber gasket of the new filter with a bit of fresh oil before installing it. Screw the new filter into place until snug.
Step 6: Add New Engine Oil
After ensuring all the old oil has drained, replace the drain plug securely. Using a funnel, pour the new engine oil into the designated fill hole. Refer to your motorcycle’s owner manual for the correct oil type and capacity.
Step 7: Check the Oil Level
Start the engine and let it run for a minute. Turn it off and wait a few moments, then check the oil level using the dipstick. Add more oil if necessary to reach the recommended level.
Step 8: Dispose of the Old Oil
Properly dispose of the used oil and filter at a designated recycling center. Never pour it down drains or throw it in the trash.
This routine maintenance task is crucial for your motorcycle’s health. By following these steps diligently, you’ll enhance engine efficiency and extend the life of your bike.
Managing Tire Pressure and Tread Depth for Safe Rides

Maintaining proper tire pressure and ensuring adequate tread depth are crucial aspects of motorcycle maintenance that significantly influence safety and performance. Regular checks can prevent accidents, enhance tire lifespan, and improve fuel efficiency.
To check tire pressure, invest in a reliable pressure gauge. Refer to your motorcycle’s manual for the recommended PSI (pounds per square inch). Perform this check when tires are cold, as pressure can increase with heat generated during riding. If the pressure is too low, inflate your tires to the specified level using an air compressor. Conversely, if the pressure is too high, release air until reaching the optimal PSI.
Tread depth is equally essential for maintaining traction. A simple DIY method to gauge tread depth involves using a penny. Insert it into the tread groove with Lincoln’s head facing down; if you can see the top of his head, it’s time to replace the tire. Regularly inspect tires for signs of uneven wear, cuts, or punctures, as these can indicate a need for maintenance or replacement.
Additionally, check the tires for balance and alignment. Misalignment can lead to premature wear and can affect handling. A balanced tire ensures a smoother ride and contributes to longevity. If you suspect any issues, consider visiting a professional or conducting further DIY assessments to ensure everything is in proper order.
Consistent monitoring of tire pressure and tread depth not only enhances your riding experience but also promotes safety on the road. Incorporate these checks into your routine maintenance to enjoy every ride with confidence.
Cleaning and Lubricating the Chain: Tools and Techniques

Regular maintenance of your motorcycle chain is essential for optimal performance and longevity. A clean and well-lubricated chain not only enhances your riding experience but also minimizes the need for costly repairs.
Tools Required:
- Chain Cleaner: Use a specialized chain cleaner or a degreaser to remove dirt and grime.
- Chain Brush: A dedicated brush helps reach tight spots and thoroughly clean the chain.
- Rags: Clean, lint-free cloths are necessary for wiping the chain and ensuring no debris remains.
- Lubricant: Choose a suitable chain lubricant, such as wax-based or oil-based, depending on your riding conditions.
- Protective Gear: Gloves and safety glasses are essential to protect against chemicals and lubricants.
Cleaning Process:
- Place your motorcycle on a center stand or use a paddock stand to elevate the rear wheel.
- Apply chain cleaner generously onto the chain, ensuring it penetrates the links.
- Use the chain brush to scrub the chain thoroughly, paying special attention to the rollers and side plates. Rotate the wheel to expose all sections.
- Wipe off excess cleaner and grime with a rag. Repeat the process as necessary until the chain appears clean.
Lubrication Technique:
- After cleaning, ensure the chain is dry before applying lubricant.
- Apply the lubricant evenly on the inner side of the chain while rotating the wheel. This ensures penetration into the critical components.
- Allow the lubricant to set for a few minutes to ensure it adheres properly before taking your motorcycle for a ride.
By incorporating these simple diy techniques into your regular maintenance routine, you can extend the lifespan of your motorcycle chain and prevent unnecessary repair issues. Regular attention to your chain not only optimizes performance but also contributes to a safer riding experience.


